Onboarding your users to collect payments
The Crezco user onboarding workflow is a straightforward way to integrate your platform for signing up and registering new users and directing them through the payment processing setup.
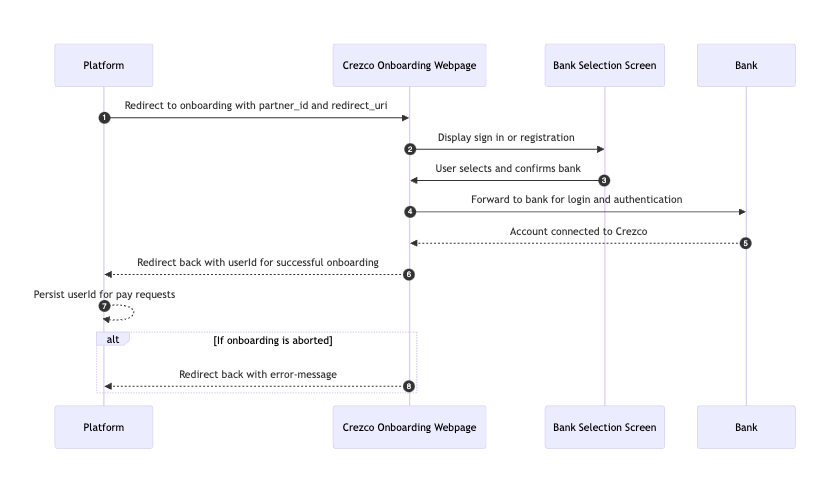
The process is initiated through a call-to-action on the your website, which directs the user to Crezco's onboarding platform. The workflow encompasses several key phases: user authentication (which involves either logging in to an existing Crezco account or registering for a new one), bank authorisation, and the selection of a primary bank account for payment deposits.
During the bank authorization phase, users select their banking provider from a list, which then facilitates a redirect to their bank’s portal for account verification and authorization, in compliance with open banking protocols and multi-factor authentication. Post-authorization, users are directed to select a default bank account for receiving payments.
onboarding workflow
Onboard users to receive payments
Initiate onboarding workflow
To initiate the onboarding workflow, you should add a call to action to your website, when the button is pressed you should redirect the user to:
- For your testing environment:
https://app.uat.crezco.com/onboarding?partner_id={partnercode}-uat&redirect_uri={uri} - For production environment:
https://app.crezco.com/onboarding?partner_id={partnercode}&redirect_uri={uri}
Please note that {partnercode} is the code assigned by Crezco to the partner platform during its original onboarding.
{uri} is an address where the merchant must be returned to after Crezco's onboarding workflow is completed, when designing this page, you should consider collecting redirect parameters such as the userId or error-message if the user is unsuccessful.
User signs in/registers
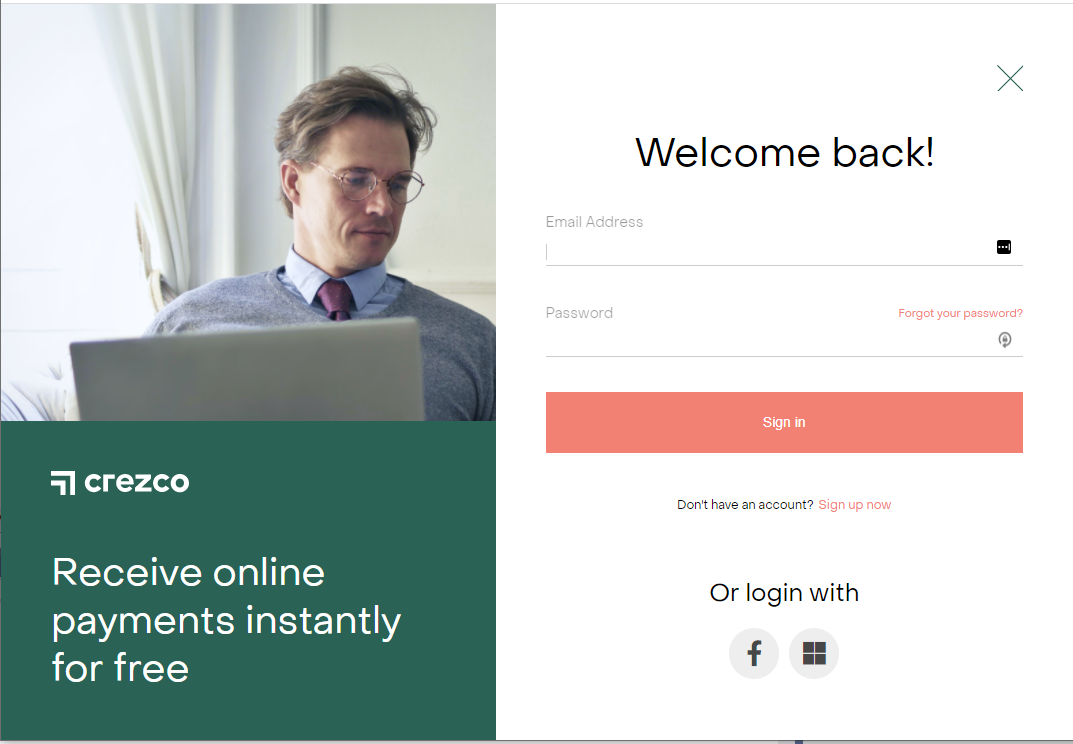
If your user already has a Crezco account, they can simply sign in, if they are new to Crezco, they can register for an account using the supported single sign on methods or their email.
Testing Connectors
Please note that in your testing environment social connectors (sign in with Facebook, Google, Microsoft) are disabled. Therefore for testing purposes you will need to create an account using an e-mail and password. Just click on "Sign up now" link on this page.
User Bank Authorisation
The bank authorisation process is made up of three steps:
- Selecting the bank provider
- Authorising bank accounts
- Confirming a default account for deposits
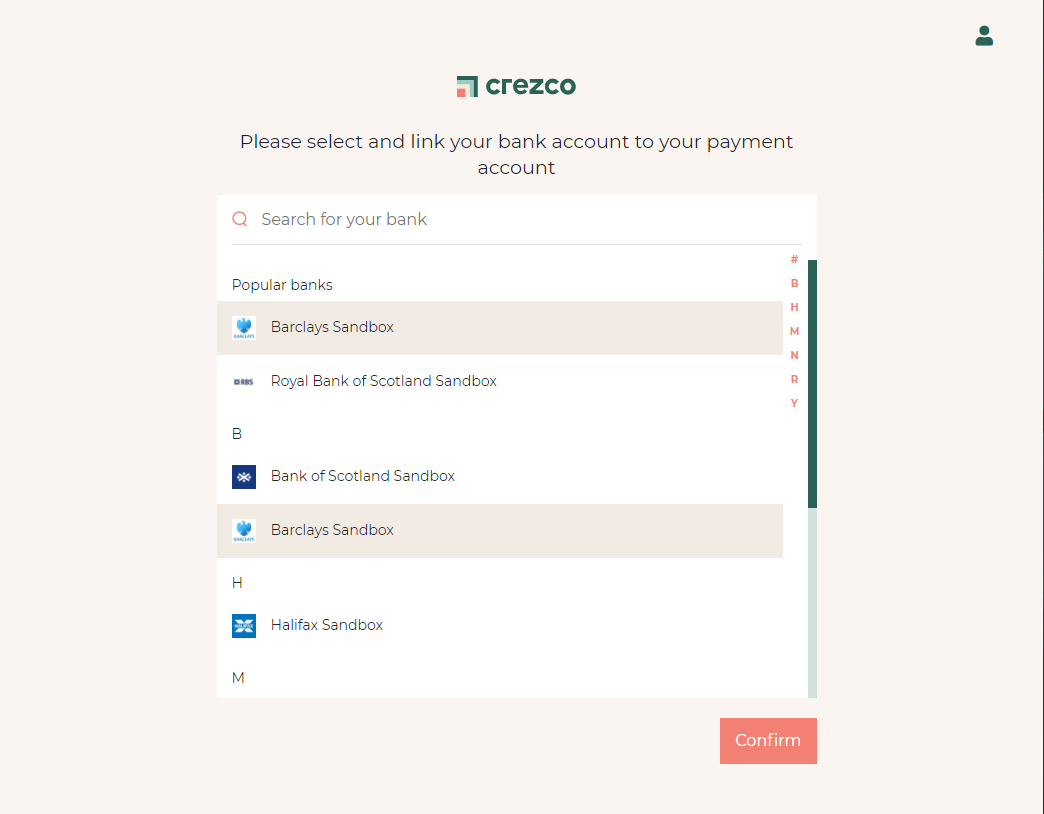
Selecting a bank provider
In order to accept payments via Crezco, your user must select a default bank account where they would like any payments deposited to.
This is to verify your users bank account details to avoid errors in bank transfers.
The first step in the process is for the user to select their banking provider, this enables Crezco to redirect the user to the correct bank for authorisation in the next step.
Authorising bank accounts
Once the user has selected their provider, they will be redirected to the bank and asked to authorise the connection using secure open banking protocols and multi factor authentication.
They should select the bank account(s) they wish to be paid into via Crezco when a pay demand is successful.
Confirming a default account
The user will then be redirected back to Crezo, here the user is presented with a list of accounts they have authorised access to.
At this point they must choose one account that will serve as their default account for receiving payments via Crezco.
Once confirmed, they will be redirected back to the Partner's website, to the URI provided as parameter in the initial step.
Completion of onboarding
Successful onboarding
Successful completion of onboarding process results in creation of the user's account and association of that user with your platform.
The userId (UUID) of the newly-created merchant is returned as query parameter user-id when the user is redirected back to the platform site. You should persist this id as it will be required to make pay-demands for the user in the future.
Aborted onboarding
If the user decides to cancel onboarding process before it is completed, or other unexpected circumstances prevent completion (e.g., the users bank is unresponsive), the onboarding process gets aborted.
In this case user also gets redirected back to the platform. However there are two differences compared with successful completion scenario:
- query parameter
user-idis not returned, and - query parameter
error-messageis returned instead, containing end-user readable message specifying the reason for the abnormal termination.
If the onboarding is aborted, then you should display the integration status to the end user as incomplete.